Installing Architectural Speakers
The HT Reference series is designed for fast and easy installs.
Mounting the Speakers
Episode in-wall and in-ceiling speakers feature the following to make your installs easier.
Magnetic Covers
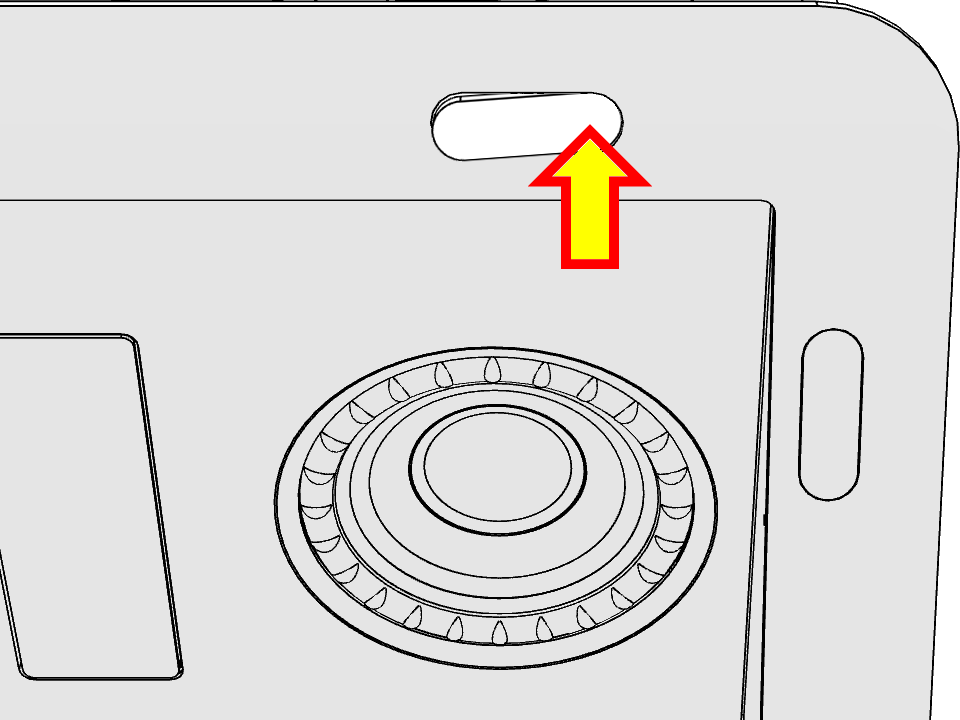
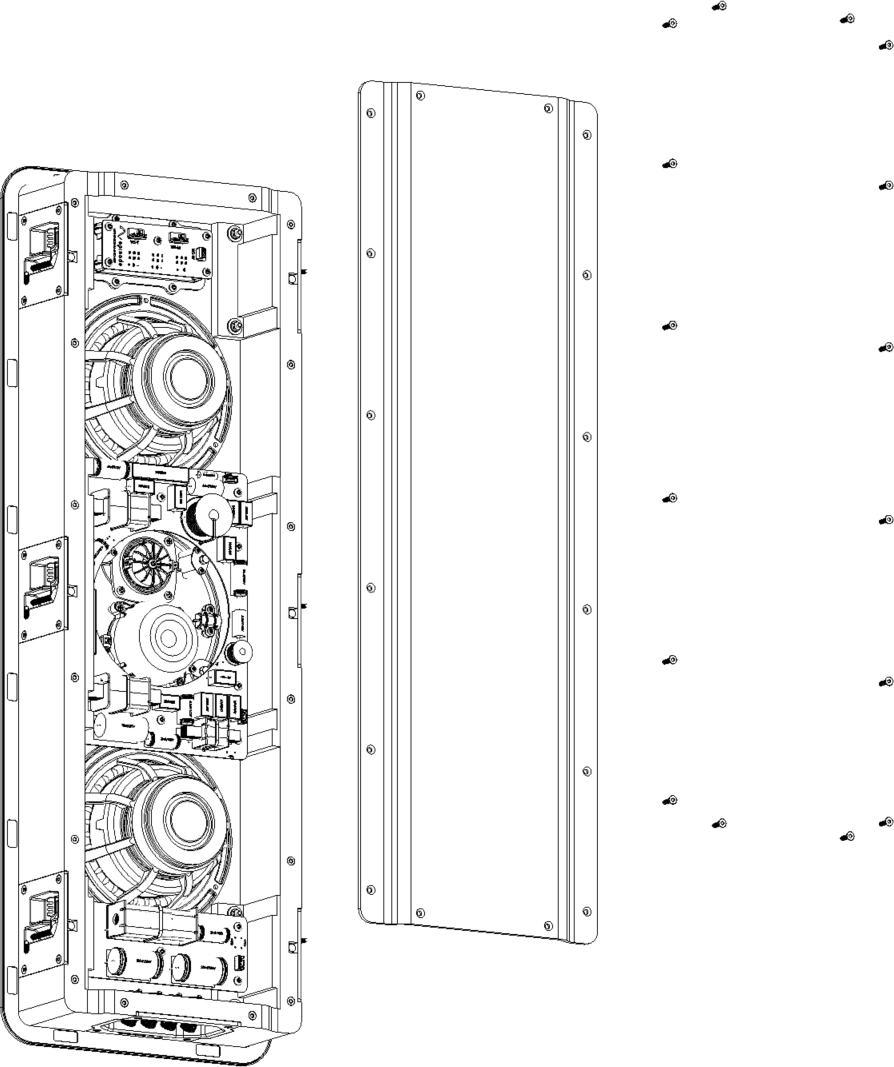
Your speaker has 4–8 mounting bays used to secure your speaker. For clean aesthetics, each of these bays is covered by a small tab.
Each tab is beveled on one inside edge. To remove the tab, press the beveled end to push other end up. This allows you to remove the tab and access the bay.
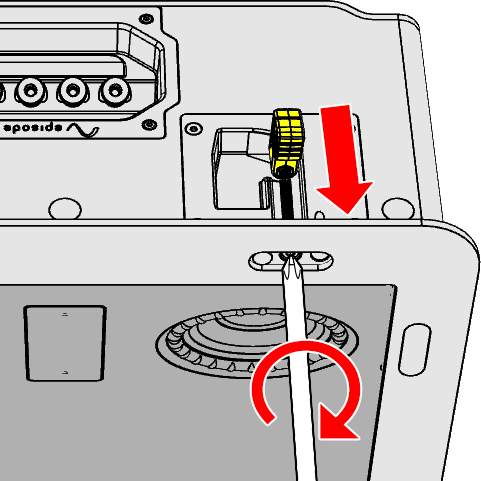
Mounting Dogs
Use a screwdriver or low-torque drill to turn the mounting dog screws clockwise until the dogs hold the speaker securely. Turn counterclockwise to release the dogs.
Caution: -.Do not overtighten the dogs. Doing so can damage the drywall and/or the speaker housing.
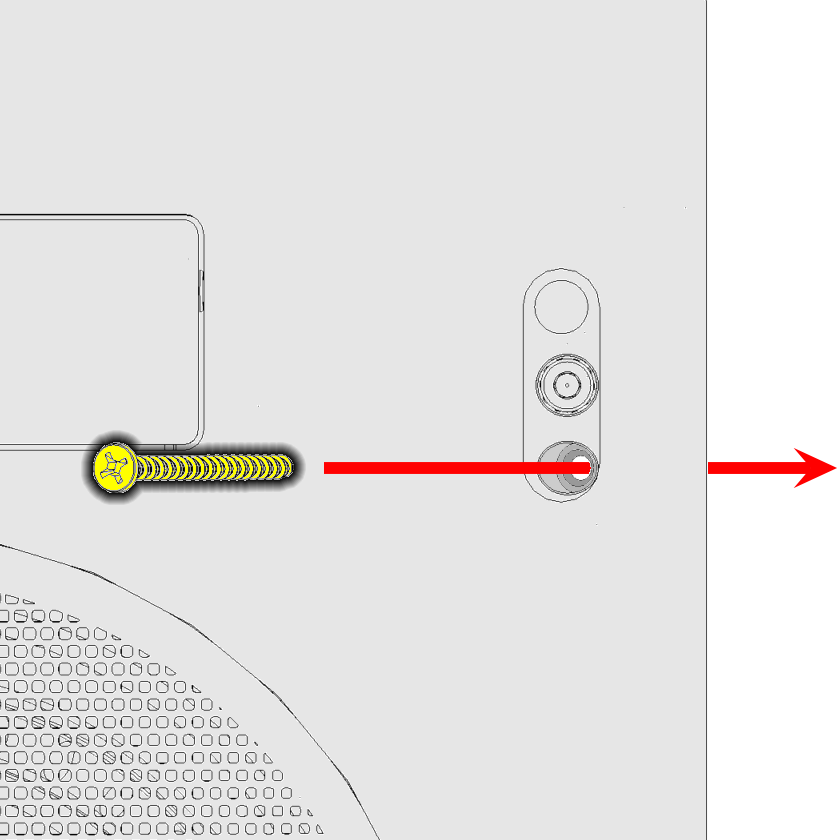
Screw Channels
If the speaker case abuts an obstruction that blocks you from using the mounting dog, insert a screw through the adjacent 45° channel to secure the speaker as shown. We recommend using a 2" long #6 screw when installed in single ½" drywall.
Caution: -.Do not overtighten the screws. Doing so can damage the speaker housing.
Removable Rear Panel
To improve bass extension when the speaker is mounted in a larger sealed enclosure, remove the rear of the speaker. Be sure to adjust the tonal balance controls to account for the change.
Retrofit installs
Once you have determined your locations, mark the surface using the supplied cutout template. Allow for the size of the speaker bezel if you install near a corner or other feature that could become an obstacle.
When cutting drywall for retrofit installs, bevel your first cut 45° inward. That way, if you encounter a stud or some other obstruction behind the drywall, you can easily replace the piece and mud over the cut.

If you encounter no problems, clean up the hole with a cut at 90°.
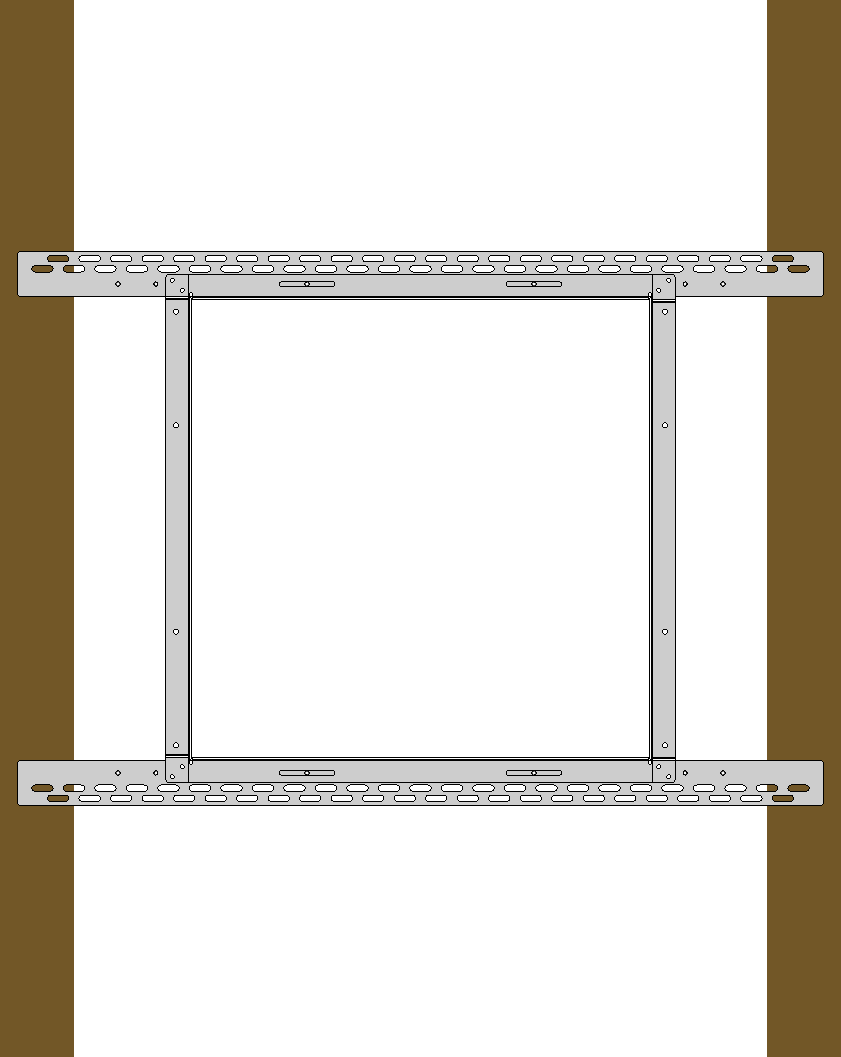
New Construction Installs
When installing in-wall speakers in new construction, you can simplify your job by using Episode Pre-Construction Brackets (sold separately). Install these prior to drywall to allow precise speaker placement.
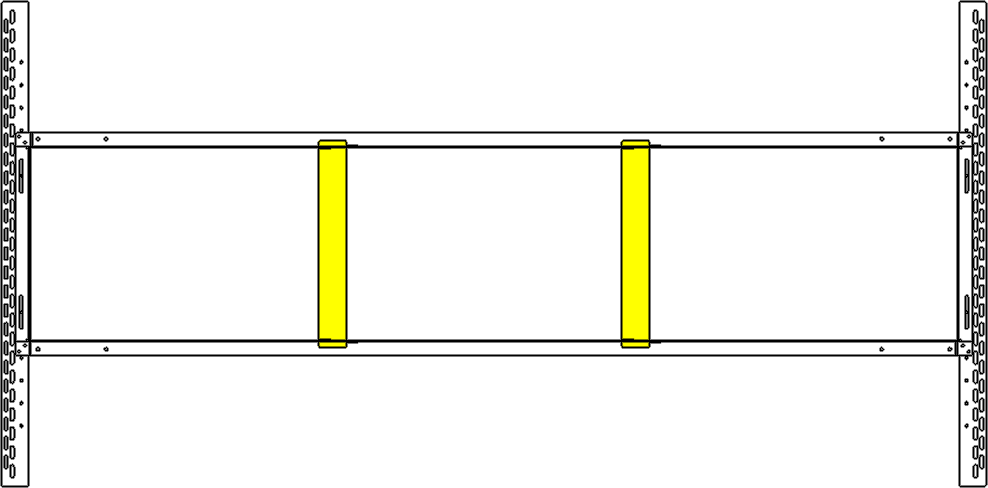
Attach Support Bars (if needed)
Although your bracket frames come assembled, certain long brackets come with optional support bars. These help the long frame to maintain its shape while being installed.
Mount the bars across the front of the frame as shown.
Attach the Arms
Your bracket frames come assembled.
Mount the arms to the rear side of the bracket as shown using the supplied screws. The arms can be mounted horizontally, vertically, or both. Split the arms if needed to span additional space between joists or studs.
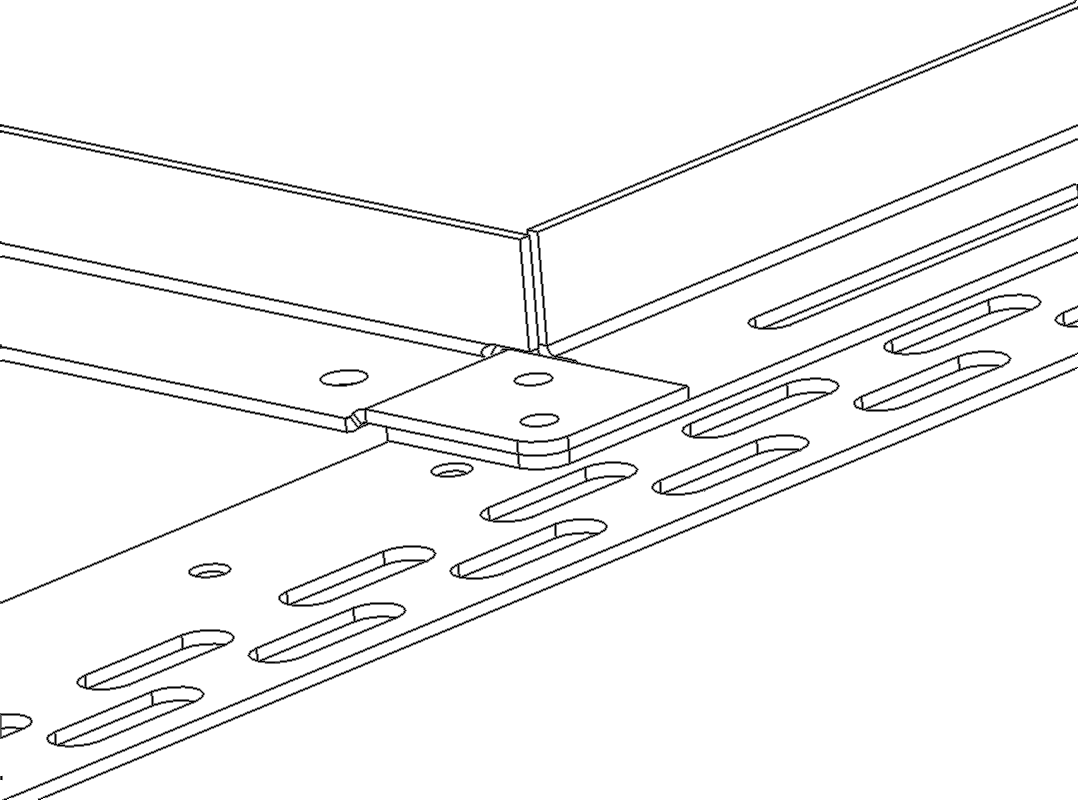
Mount the Assembly
Use a pan head or other shallow-head screw to attach the arms to the front of the stud or joist.
Ensure that the flanges of the bracket face outward.
Pro Tip: -_If your brackets have center support bars, remove them after the drywall opening has been cut.