Using the UI Configuration agent
Use the UI Configuration agent to manage wallpaper settings and upload wallpapers, to manage screen saver settings for T3 touch screens and EA On-Screen Navigators, to configure the return to home setting for T3 touch screens and EA On-Screen Navigators, and to add favorites for all navigators in the project.
To configure wallpaper with the UI Configuration agent:
- In the Agents view, select the UI Configuration agent, then click on the Wallpaper tab.
- To configure the wallpaper in a single room, select the desired room in the Location pane.
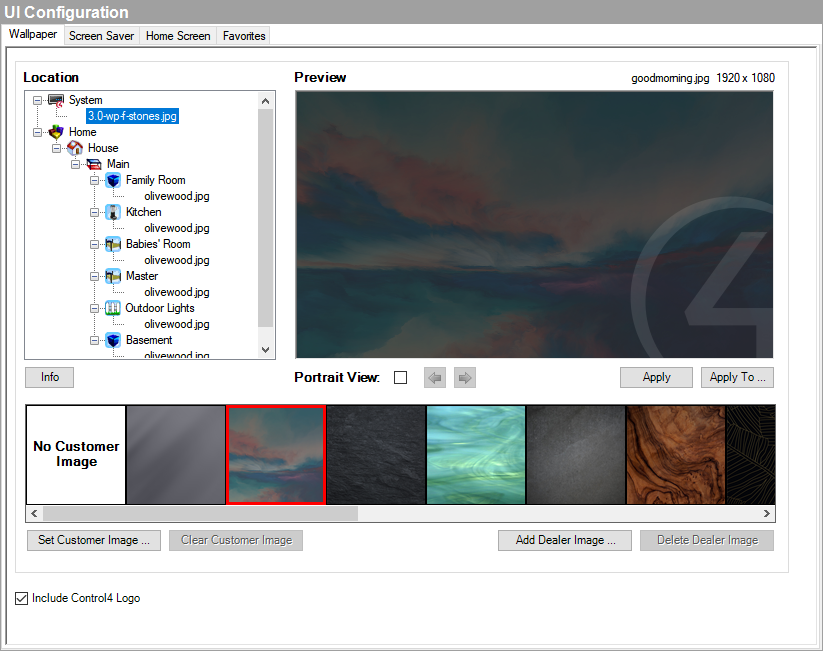
- Select from the default images listed, or click Add Dealer Image to add a custom image. Wallpaper images should be JPG files in a 16:9 format with a resolution of 1920 pixels wide by 1080 pixels high for best results. Images with different resolutions may be scaled or trimmed to fit and may produce undesirable results. Up to 10 dealer images can be added and configured to any rom.
- Click Apply to set the wallpaper to the room or click Apply To … to select the rooms to be configured with the wallpaper.
The homeowner can also add a custom image (up to one for each room) using the Control4 app. For information on how to add images with the Control4 app, see the Control4 System User Guide (ctrl4.co/userguide). After a custom wallpaper image has been configured, you can use the UI Configuration agent to configure rooms to use the image.
- To configure the custom wallpaper in a single room, select the desired room in the Location pane. Select the image from the images listed and click Apply to set the wallpaper to the room or click Apply To … to select the rooms to be configured with the wallpaper.
- To clear the custom wallpaper image, select the custom image and click Clear Customer Image.
You can also choose to include or not include the Control4 logo on any wallpaper images. Click the box next to Include Control4 Logo to include the Control4 logo, and then continue the process of configuring a wallpaper image.
To configure screen saver settings with the UI Configuration agent:
- In the Agents view, select the UI Configuration agent, then click on the Screen Saver tab.
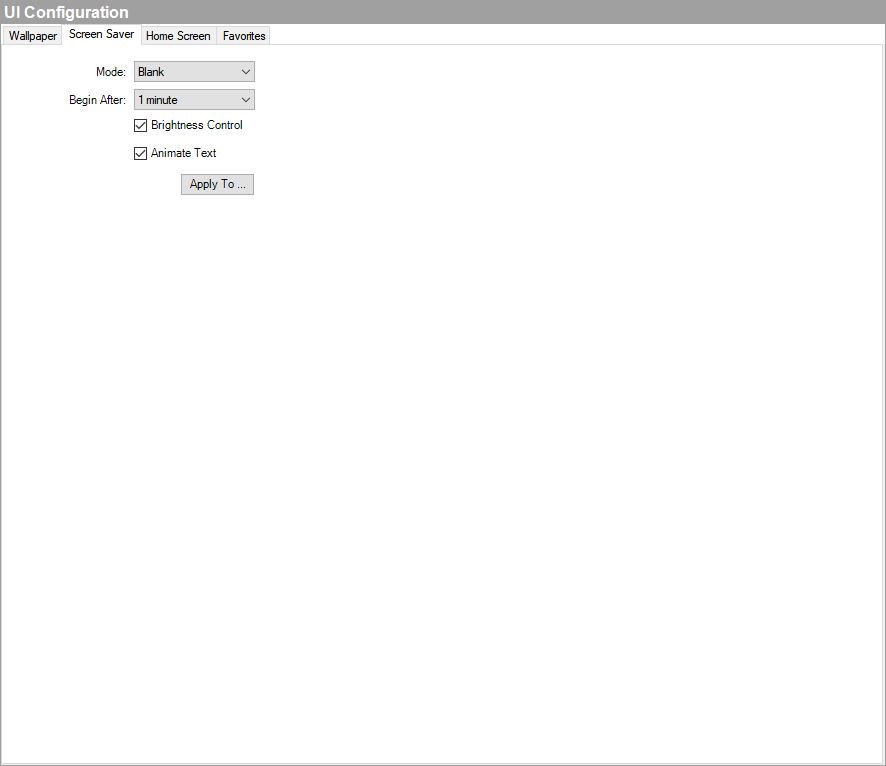
- Choose the screen saver mode. Available options include:
- None
- Blank
- Date and Time
- Current Media
- Photos
- Custom
- Depending on your chosen screen saver mode, configure any additional options that appear.
- Configure the Begin After option. The value selected is the period of time the touch screen will wait after detecting inactivity until it turns on the screen saver.
- Check the box next to Brightness Control to add a brightness control icon to the screen saver.
- Check the box next to Animate Text to apply a small movement to the text to avoid screen burn-in.
- Click Apply To … to select the navigators to be configured with the screen saver settings.
To configure return to home settings with the UI Configuration agent:
- In the Agents view, select the UI Configuration agent, then click on the Screen Saver tab.
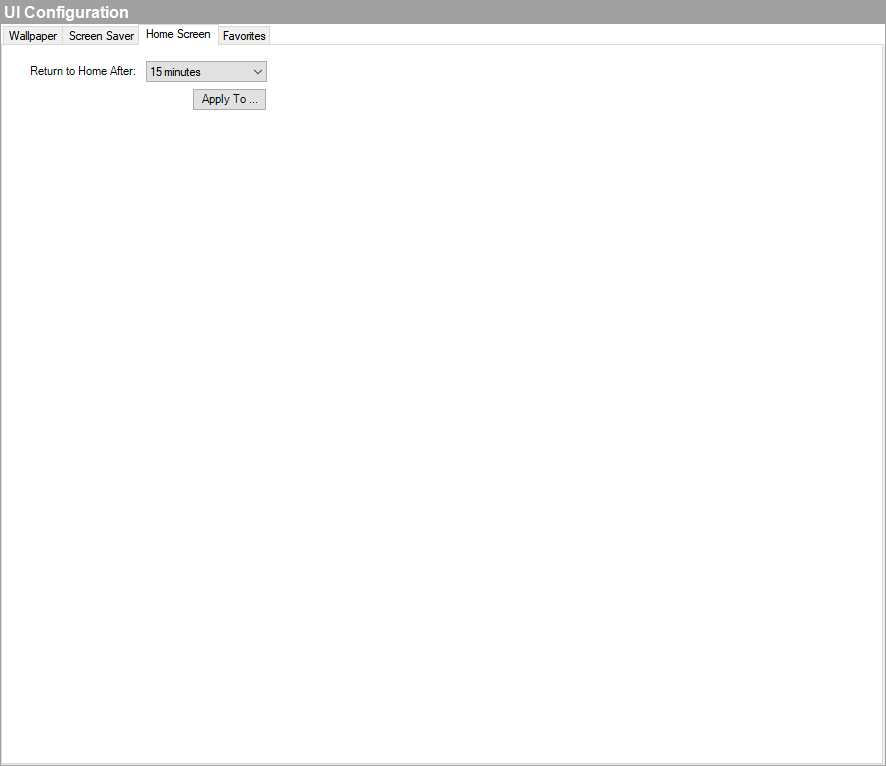
- Configure when the Navigator will return to the home screen by choosing the time in the Return to Home After: menu.
To configure favorites with the UI Configuration agent:
- In the Agents view, select the UI Configuration agent, then click on the Favorites tab.

- To add favorites to all Room Screen, click the box next to the favorites you want to add in the Add Favorites pane.
- Click Add, and then click OK to add the selected favorites to all applicable Room Screens.
To clear all configured favorites and reset to the default favorites, click Clear Favorites.