Composer views
In this view, you create the foundation of the Control4 system by building the project tree.
To design the Smith Home project:
- Start Composer and connect to a Director on a local network.
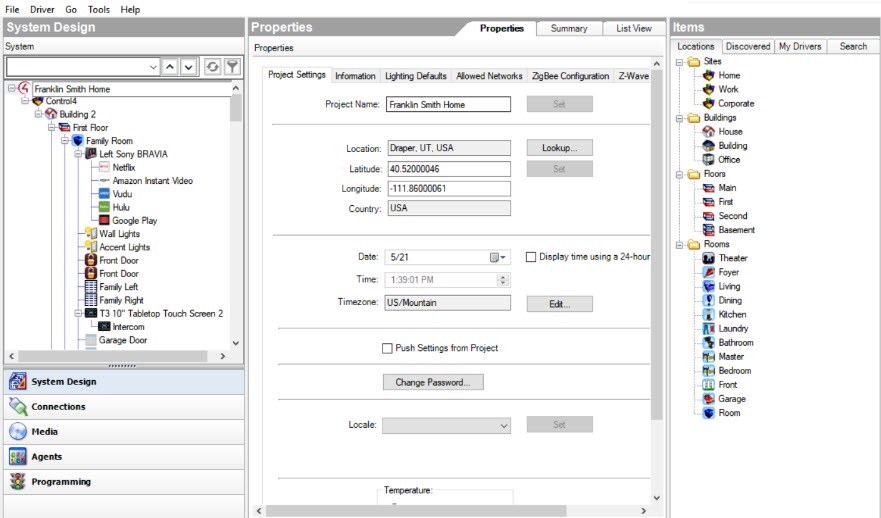
- Enter the Project Properties for the Smith home.
- Name—Franklin Smith Home.
- ZIP Code—84003 or enter a latitude and longitude manually.
- Date & Time—Use the drop-down menu to change these as desired.
- Time Zone—Use the drop-down menu to select the appropriate zone.
- Add rooms to the project tree.
- In the Locations tab, double-click on a room to add it to the project tree.
- Continue to add rooms until you have included all rooms you want in the house (rooms that will have automated devices). You can also drag these items to an object in the project tree.
- Theater
- Bedroom
- Front
Example: Add three rooms.
Tips: To build the system design, define the project configuration in the project tree. You do not have to add all the items in the project tree manually, such as Site > Building > Floor > Room because Composer Pro automatically adds the required infrastructure.
Also, you can rename the objects as desired; for example, Franklin Smith Home > Home > House > Main >Theater. For more information, see Composer Pro Getting Started.
To add the devices:
- Add the controller to a room in the project tree.
- When setting up a system, first add the controller driver to the list. In the project tree, select the room where you want the controller to reside. In the Items pane > My Drivers tab, double-click a controller to move it to the room. See the example below.
- From the project tree, select Theater. In the Items pane > My Drivers tab under Controllers, double-click Controller or drag it to the room where it resides—in this case, Theater. The controller and Digital Audio appear in the project tree. The Digital Audio object resides on the controller, but shows up as a separate object in the project tree. The Digital Audio provides the functionality to play media.
Note: If you installed this version of Composer Pro on a computer with an older version of Composer Pro, right-click in the My Driver tab, and select Restore Default List. This will update the My Driver list.
Example: Add a controller to the Theater Room:

- Add the Lighting and Navigators to the applicable rooms. The example below shows some devices you can add.
- In Lighting > Light, double-click Wireless Dimmer, and then rename to Dimmer.
- In Lighting > Light, double-click Wireless Switch, and then rename to Light Switch.
- In Lighting > Light, double-click Wireless Outlet Switch, and then rename to Television Outlet Switch.
- In User Interface, double-click System Remote Control.
- In User Interface, double-click 6-Button Keypad.
Example: Select Theater in the project tree. In the My Drivers tab, do the following:
Tip: Use a descriptive name. When adding devices to the home, right-click and select Rename to rename them with a descriptive name. For example, if you have two dimmers in a room, give them a descriptive name such as “Wall Dimmer” or “East Dimmer.” This helps you identify the specific dimmer later when identifying connections. If there's only one dimmer or switch in a room, however, you can keep the generic title "Dimmer" or "Switch."
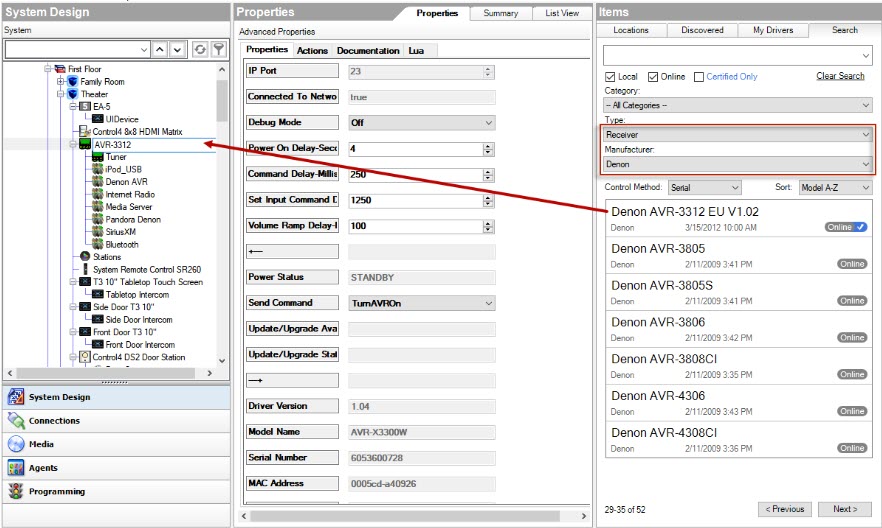
- Add a Receiver to the applicable room.
- In Audio/Video, double-click Receiver.
- In the dialog box that appears, select Online Database, select the manufacturer Denon, and then double-click AVR-3312] to add the receiver to the project tree.
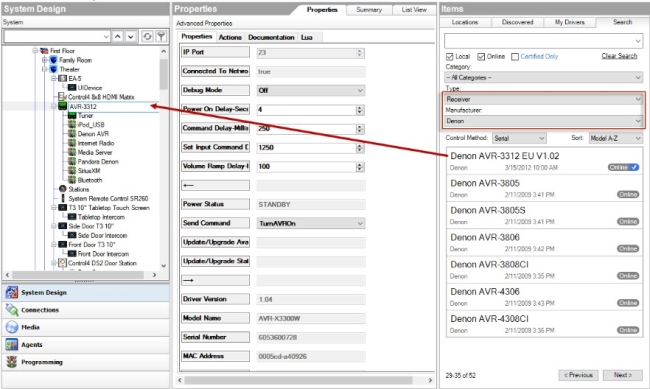
Example: Add a Receiver to the Theater. To add, select Theater in the project tree. From the My Drivers tab, do the following:
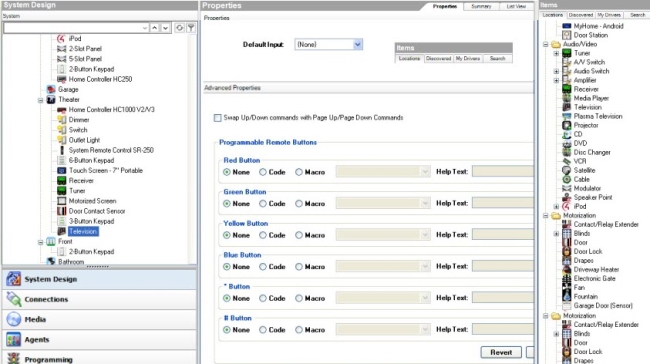
- Add a Television to the applicable room. This will probably be the same room where the controller is.
- In Audio/Video, double-click Television.
- In the dialog box that appears, select Online Database, select the manufacturer Samsung, and then double-click HC-J655W[IR].
The UHF/VHF object may be added to enable you to scan for UHF/VHF broadcast channels.
Example: Add the television to the Theater. To add, select Theater in the project tree. From the My Drivers tab, do the following:

- Add additional Audio/Video devices to the room.
- In Audio/Video, double-click DVD.
- In the dialog box that appears, select Online Database, select the manufacturer Samsung, and then double-click DVD HD841[IR].
Example: Add the DVD player to the Theater. To add, select Theater in the project tree. From the My Drivers tab, do the following:
Note: If you can access a wireless touch screen, add it now to your project. If you previously had a wireless touch screen on your system prior to Release 1.3, follow the special update instructions in “Information about older releases.”
- Add a motorized device or sensor to the applicable room.
- In Motorization, double-click Motorized Screen.
- In Sensors, double-click Door Contact Sensor.
Example: From the My Drivers tab, add a motorized screen and a door contact sensor to the Theater room from the online database. To add, select Theater in the project tree. In the My Drivers tab, do the following:
- Repeat Steps 2 through 6 as needed to add more devices to the applicable rooms.
- Select Bedroom in the project tree. In the My Drivers tab, do the following:
- In Lighting > Light, double-click Wireless Dimmer, and then rename it to Bedroom Dimmer.
- In User Interface, double-click Touch Screen.
- Select Front Room in the project tree. In the My Drivers tab, do the following:
- In User Interface, double-click 3-Button Keypad.
- In Motorization, double-click Electronic Gate.
- In Motorization, double-click Sprinklers.
- In Sensors, double-click Doorbell.
- In Sensors, double-click Motion Sensor.
- In HVAC, double-click Wireless Thermostat.
Example: To finish creating the project tree for the example project, add devices to the Bedroom and Front Room as follows.
Bedroom:
Front Room: