INSTALLING THE BRACKET
Caution! Disconnect power to the doorbell transformer or power to the circuit at the circuit breaker before starting.
- Remove the doorbell and disconnect the two wires on the back.

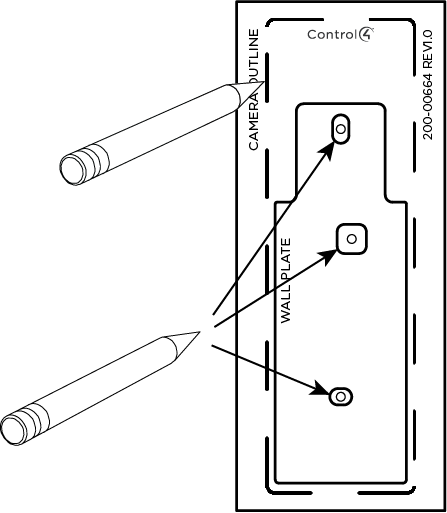
- Using the template included in the box, mark
the holes for mounting the VDB and the cable
passthrough cutout.
Trim the template and mark the camera outline if you need to modify the building materals (trim, rock, brick, etc.) to make the VDB fit.
Important! The VDB should never be mounted more than 6 ft (2 m) off the ground.
Important! Make sure existing doorbell wire lines up with the cable passthrough cutout.
- Drill 3/32" (2.4 mm) pilot holes for the wood screws to mount the metal bracket. If using the anchors, drill 3/16" (4.8 mm) pilot holes for the anchors.
Important! Use appropriate anchors if installing the VDB to stucco, brick, or other construction material. Wood screws are included in the box.
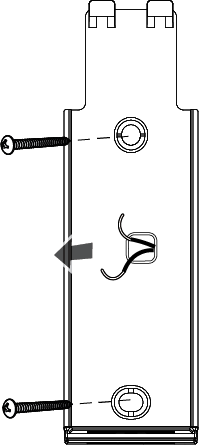
- Install the metal bracket for the VDB using the
provided screws. Pull the doorbell cable through
the bracket before installation.
After connecting to the metal bracket, you will need to push any extra length in the doorbell cable back into the hollow wall space. Trim the cable if needed.
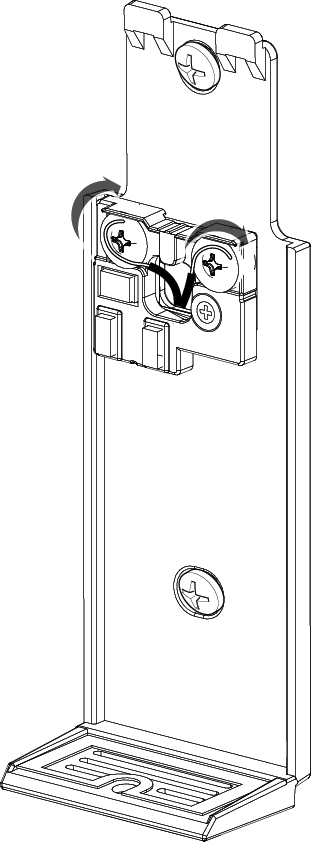
- Connect the two doorbell wires to the
terminals on the metal bracket
After connecting the doorbell wires, push any excess length back into the wall cavity.
Important! Wire polarity doesn’t matter.
Go to CONNECTING TO THE POWER ADAPTER WITH A MECHANICAL DOORBELL CHIME or CONNECTING TO THE POWER ADAPTER WITHOUT A MECHANICAL DOORBELL CHIME